
Radon is the second leading cause of lung cancer after smoking, and your basement is usually where it concentrates first. If a recent short-term test came back at 6, 8, or even 14 pCi/L, the number is alarming but the fix is well understood. The EPA, CDC, and WHO all agree on the same playbook, and homeowners across the country bring readings down to under 2 pCi/L every day.
This guide walks through how to lower radon levels in a basement using the same methods certified mitigators rely on. You will learn what the 4 pCi/L EPA action level actually means, how to confirm your number with proper testing, and how the four proven mitigation strategies compare. I have pulled specifics from EPA guidance, CDC documentation, and field-tested DIY instructions so you can decide whether to tackle this yourself or hire a pro.
Even if you are in the middle of a home purchase and feeling pressured by inspection deadlines, the path forward is clear. Radon is fixable in virtually every home, usually within a single day of installation. Let’s start with why basements collect radon in the first place.
Table of Contents
What Is Radon and Why Basements Are So Vulnerable
Radon is a colorless, odorless radioactive gas released when uranium naturally breaks down in soil, rock, and groundwater. It seeps upward through the ground and enters any home through tiny openings you would never notice, including hairline cracks, construction joints, sump pits, and the porous concrete itself.
The reason basements collect radon is simple physics. Warm air rising through your home creates a slight negative pressure in the lowest level, a phenomenon called the stack effect. That low pressure actually pulls soil gas inward through the foundation like a slow, constant vacuum. The gas has nowhere to go but up, so it accumulates at the lowest point first.
Homes with dirt floor basements, stone foundations, or hollow block walls tend to show the highest readings. Forum reports from homeowners in radon-prone regions describe dirt basements with stone pillars regularly hitting double-digit pCi/L values. Even modern poured-concrete basements are not immune, because concrete is naturally porous and every home has penetrations for plumbing, gas lines, and electrical conduit.
This is also why radon is a statewide issue rather than a regional one. The EPA Zone 1 map covers parts of nearly every state, and high readings have been documented in all 50. Testing is the only way to know where your home stands.
How to Lower Radon Levels in a Basement: The EPA 4 pCi/L Threshold
The single most important number to know is 4 pCi/L (picocuries per liter). The EPA recommends taking action to reduce radon in any home that tests at or above 4 pCi/L. This is not a “safe versus unsafe” line, it is the threshold at which the health risk clearly justifies the cost of mitigation.
The World Health Organization goes further and recommends action at 2.7 pCi/L. That lower number reflects newer risk data and is widely cited by knowledgeable homeowners and certified mitigators. Practically speaking, if your long-term average is above 2 pCi/L, mitigation is worth considering.
There is no truly “safe” radon level because any exposure carries some cancer risk. But the risk scales steeply. A reading of 4 pCi/L delivers roughly the same radiation dose as 200 chest X-rays per year. At 10 pCi/L, the lifetime lung cancer risk for a non-smoker is about 1 in 50, and for a smoker it jumps to roughly 1 in 4.
Reddit discussions in r/homeowners and r/radon show just how common this confusion is. Buyers routinely ask whether 2.7 or 3.9 pCi/L is “fine” because it sits just under the EPA threshold. The honest answer is that lower is always better, and even readings under 4 pCi/L can and should be reduced if you spend significant time in the basement.
Step 1: Test Before You Mitigate
You cannot fix what you have not measured. Every credible source, from the CDC to certified mitigation professionals, starts with the same advice: test first, then act. A single short-term test tells you whether a problem exists, but long-term testing is what should drive the mitigation decision.
Short-term tests use activated charcoal or alpha-track detectors placed in the lowest lived-in level of the home for 2 to 7 days. They are cheap, available at any hardware store, and great for a quick screening. The catch is that radon fluctuates daily and seasonally, so a single short-term result can be misleading.
Long-term tests run for 90 days to a full year using alpha-track or electret detectors. They average out weather, seasonal, and ventilation swings to give you a real picture of your exposure. The EPA specifically recommends a long-term test before installing a mitigation system, because over-mitigating based on a single high short-term reading wastes money and under-mitigating puts your family at risk.
For placement, follow these rules:
Place the kit in the lowest livable level, even if it is unfinished.
Keep it at least 20 inches off the floor and away from exterior walls.
Avoid kitchens, bathrooms, laundry rooms, and direct sunlight.
Close windows and exterior doors for 12 hours before and during a short-term test.
Do not place near drafts, fans, or vents that could skew the reading.
Continuous radon monitors, like those made by Airthings, give you live readings and are excellent for tracking the effectiveness of mitigation after it is installed. Many homeowners keep one running year-round as an early warning system.
Method 1: Sub-Slab Depressurization System (SSDS)
The Sub-Slab Depressurization System, or SSDS, is the gold standard for radon mitigation and the method the EPA and CDC recommend most often. When installed correctly, an SSDS can reduce basement radon levels by up to 99 percent. It works by reversing the pressure difference that pulls soil gas into your home.
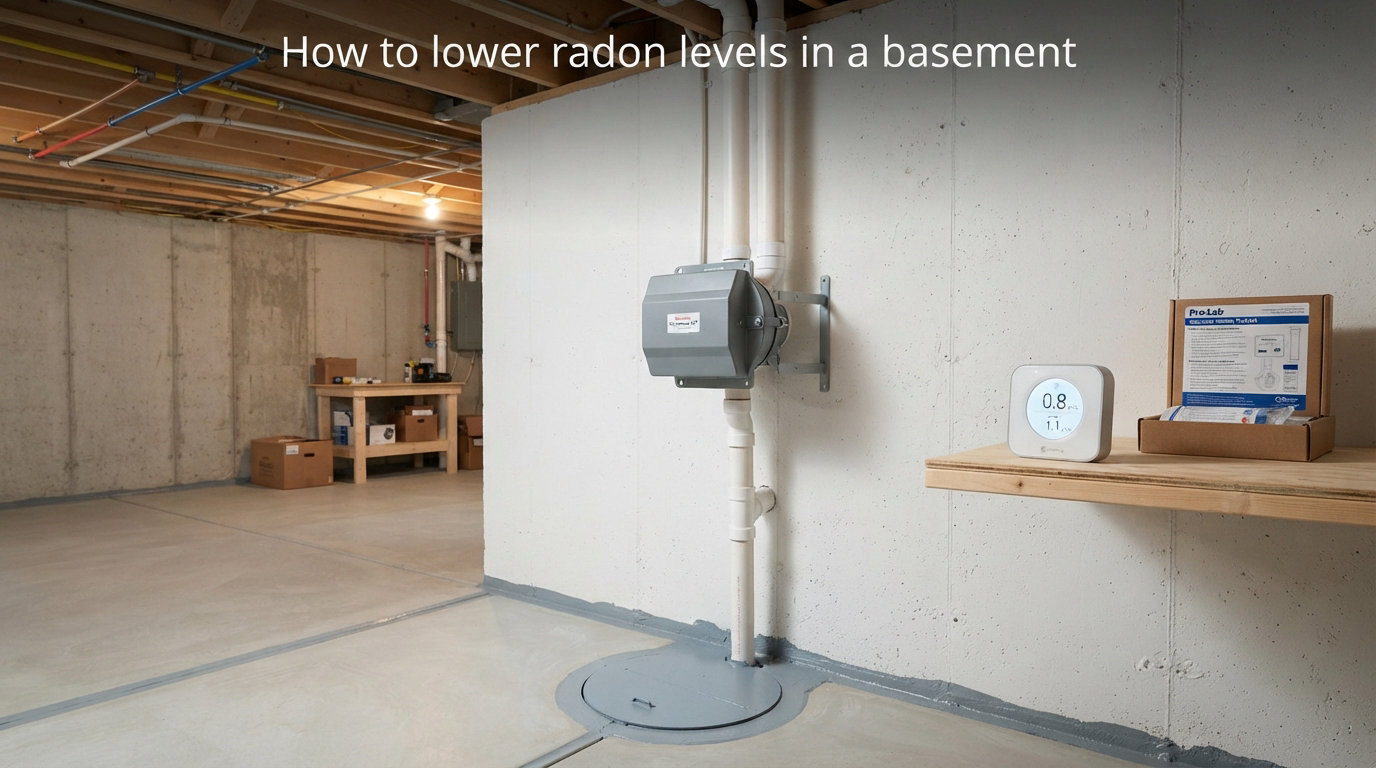
Here is how the system works in plain terms. A certified installer (or a careful DIYer) drills a 4-to-5 inch hole through the basement concrete slab and removes a small amount of soil from beneath it to create a suction pit. A PVC vent pipe is inserted into that hole and routed up through the house, exiting through the roof or an exterior wall above the eave. An inline radon fan installed in the pipe run creates a constant vacuum under the slab, pulling soil gas out and venting it above the living space before it ever enters the home.
The basic SSDS installation steps look like this:
Locate the ideal suction point, usually near the center of the slab and away from footings.
Cut a 4-to-5 inch hole through the slab with a concrete coring drill or jackhammer.
Excavate roughly one cubic foot of soil from beneath the slab to form a collection pit.
Install 3-inch or 4-inch schedule 40 PVC pipe from the pit up to the fan location.
Mount an inline radon fan in the pipe run, typically in the attic or on the exterior.
Route the discharge pipe above the roofline, at least 10 feet from any operable window.
Seal the pipe-to-slab joint with hydraulic cement or silicone caulk.
Seal every visible crack, sump lid, and floor-wall joint.
Install a manometer on the pipe so you can confirm the fan is maintaining suction.
Run a post-mitigation radon test after 24 hours of continuous fan operation.
There are two key warnings. First, the discharge point must vent above the roof and away from windows, doors, and intake vents. Venting at ground level simply moves the radon into your yard and back into the house. Second, the fan must run continuously. If it fails or is switched off, radon levels will return to baseline within days.
A properly installed SSDS includes a manometer, a simple U-tube fluid gauge mounted on the pipe. The fluid levels should sit a few inches apart, indicating the fan is pulling suction. If the levels equalize, the fan has stopped and you need to address it immediately.
Method 2: Sealing Cracks and Foundation Openings
Sealing cracks and openings is the most accessible DIY step, but it is rarely enough on its own. The EPA considers it a useful complement to an SSDS, not a stand-alone solution. Concrete is porous, and radon molecules are tiny enough to diffuse through even airtight solid slabs over time.
That said, sealing reduces the entry points and lowers the load your mitigation system has to handle. It also helps prevent moisture intrusion, which is a separate basement problem. The materials and approach matter.
For cracks wider than about 1/8 inch, use hydraulic cement. It expands as it cures, locks into the crack, and holds up against water pressure. Clean the crack with a wire brush first, widen it slightly into a V-shape if possible, and pack the cement in firmly.
For hairline cracks, floor-wall joints, and gaps around pipes, use polyurethane caulk designed for masonry. Polyurethane stays flexible, bonds well to concrete, and can stretch with seasonal movement. Avoid standard acrylic latex caulk, which will dry out and crack within a year or two.
Other sealing targets to check:
Sump pump crocks: install an airtight sealed lid with a grommet for the discharge pipe.
Concrete block walls: seal the top of the cores where the block meets the joist.
Plumbing rough-ins: foam or caulk around every pipe penetration in the slab.
Crawl space accesses: install a tight-fitting insulated cover over any hatch.
Floor drains: use a trap-prime compatible drain cover or a one-way radon drain.
Forum experience is consistent here. Homeowners who seal cracks alone typically see a 10 to 30 percent radon reduction, sometimes less. That can move a 5.5 pCi/L reading down to 4 pCi/L, but it will not bring 14 pCi/L into safe territory without an active system.
Method 3: Natural Ventilation and House Pressurization
Natural ventilation is the oldest radon reduction trick and the one most people try first. The concept is straightforward: open basement windows and run fans to dilute the air. It does work, but only while the windows stay open and only as a temporary measure.
Ventilation has two serious limits. First, you cannot run a basement with open windows in winter, which is exactly when radon levels peak. Second, the energy cost of constantly heating or cooling incoming outside air is significant. The EPA does not consider natural ventilation a long-term mitigation strategy.
House pressurization takes the ventilation idea and makes it more controlled. A fan blows conditioned outside air into the basement to create a slight positive pressure, which pushes back against soil gas trying to enter. Done well, it can cut radon levels by a meaningful margin, but it is finicky, energy-intensive, and hard to balance.
The more practical upgrade is a Heat Recovery Ventilator, or HRV. An HRV exchanges stale indoor air for fresh outdoor air while recovering most of the heat through a heat exchanger. A well-sized HRV installed in a basement can reduce radon by 50 percent or more in homes where SSDS is impractical, such as homes with dirt crawl spaces or shared foundation walls. HRVs are also a strong option if you want to address humidity, CO2, and other indoor air quality concerns alongside radon.
The trade-off is cost and complexity. An HRV with professional installation runs in the same range as a full SSDS, and it does not remove radon as effectively. Most experts recommend an HRV only when soil depressurization is not feasible.
How to Lower Radon in a Finished Basement
Finished basements add a layer of complexity because drywall, framing, dropped ceilings, and finished floors all conceal the slab and foundation walls. You cannot seal what you cannot see, and you cannot drill through what you cannot reach without significant remodeling.
The good news is that an SSDS still works beautifully in a finished basement. The pipe run is typically routed through a closet, a utility chase, or alongside a finished wall with a small drywall enclosure built around it. A skilled installer can hide the pipe so it looks like part of the home rather than an industrial add-on.
For sealing, focus on what is accessible. Pull up a small section of carpet or flooring near the perimeter if you suspect the floor-wall joint is unsealed. Check inside utility closets where plumbing penetrations are usually visible. Seal any sump crock, even if it sits behind a finished wall, by adding an airtight lid accessible through an access panel.
One common mistake is ignoring the framing cavities. Finished basement walls are often built with a small gap between the back of the framing and the concrete wall. That gap acts like a chimney, drawing soil gas from the slab up into the wall cavity and out through outlets and trim. Sealing the bottom plate of every finished wall to the floor with caulk or spray foam stops that pathway.
If your finished basement includes a bedroom or office where someone spends hours per day, treat any reading above 2 pCi/L seriously. The exposure math is the same whether the basement is finished or not, and the lung cancer risk accumulates with time spent in the space.
DIY vs Professional Radon Mitigation
The DIY versus professional question comes down to three factors: your skill level, your local code requirements, and how confident you want to be in the result. Both paths can produce a system that meets EPA performance goals, but they differ in cost, risk, and accountability.
A DIY SSDS installation typically costs between $500 and $1,200 in materials. You will need a concrete coring drill or rental jackhammer, schedule 40 PVC pipe, an inline radon fan rated for your slab size, fittings, hydraulic cement, polyurethane caulk, and a manometer kit. Airthings and several mitigation suppliers publish detailed step-by-step guides with materials checklists.
The honest risks of DIY are real. Drilling through a slab can hit a hydronic heating tube, a plumbing line, or a post-tension cable, any of which is a costly mistake. Choosing the wrong fan size leaves you with inadequate suction. Routing the vent pipe incorrectly can dump radon back into the home through a window or attic vent. And in many jurisdictions, building code requires that radon systems be installed or signed off by a licensed professional.
Professional installation typically runs $1,200 to $2,500 depending on your region, foundation type, and the complexity of the pipe run. A certified mitigator will pull permits, test suction points, size the fan correctly, and guarantee performance with post-installation testing. Many also offer a warranty that the system will keep your readings below 4 pCi/L, and ideally below 2 pCi/L.
The general guidance from EPA and CDC is clear: hire a certified radon mitigation professional whenever possible. The certification programs run by AARST and state agencies give you recourse if something goes wrong. DIY makes sense if you are experienced with concrete, plumbing, and electrical work, and if your local code allows it.
How to Choose the Right Radon Mitigation Method
Choosing the right method starts with your test results and your foundation type. A reading of 4.5 pCi/L in a poured concrete basement calls for a different plan than 25 pCi/L in a dirt crawl space. Here is how to work through the decision.
Assess Your Test Results
Use long-term results, not a single short-term test, to drive the decision. If your 90-day or year-long average is between 2 and 4 pCi/L, start with sealing and continuous monitoring. If the number is between 4 and 8 pCi/L, an SSDS is the standard answer. Anything above 8 pCi/L almost always calls for an active SSDS, often paired with additional suction points or a more powerful fan.
Match the Method to Your Foundation
Poured concrete basements are the easiest case for SSDS because the slab is solid and predictable. Hollow block walls may require the pipe run to also tap into the block cores, a variation called block-wall depressurization. Dirt crawl spaces are typically handled with a heavy plastic membrane sealed to the walls, with a suction pipe under the plastic, known as sub-membrane depressurization. Slab-on-grade homes without a basement still use SSDS but with a shorter pipe run.
Factor In the Cost by Method
Cost is one of the biggest sources of confusion for homeowners. Here is a realistic breakdown based on current professional rates and material costs:
DIY sealing cracks and sump: $50 to $200 in materials, plus your time.
DIY SSDS materials only: $500 to $1,200, depending on fan and pipe length.
Professional SSDS installation: $1,200 to $2,500 in most markets.
Professional SSDS with complex routing or multiple suction points: $2,500 to $4,000.
Heat recovery ventilator with professional installation: $2,000 to $5,000.
Block-wall depressurization add-on: $400 to $800 above standard SSDS.
Crawlspace sub-membrane system: $1,500 to $3,000.
Operating costs are minor but real. An SSDS fan uses about 60 to 100 watts continuously, which works out to roughly $80 to $150 per year in electricity. Plan to replace the fan every 7 to 12 years, at a cost of $200 to $400 for the part.
Consider Climate and Seasonal Variations
Radon levels are not constant across the year. Readings are typically highest in winter because frozen ground, snow cover, and closed windows all trap soil gas near the home. The stack effect also intensifies in cold weather as warm air rises faster through the house. Homeowners often see winter readings 2 to 5 times higher than summer readings in the same home.
Heavy rain and barometric pressure drops can spike radon readings within hours. This is why a single short-term test is unreliable. If your short-term test was performed during a storm or cold snap, assume the result is on the high end of your home’s normal range.
If you live in a heating-dominated climate, design your system with the worst case in mind. A fan sized for summer performance may not keep up in January. Your installer should size the fan based on sub-slab communication testing, not just on square footage.
Watch for Red Flags When Hiring a Contractor
Not every contractor who advertises radon mitigation is qualified. Ask whether they are certified by AARST (the American Association of Radon Scientists and Technologists) or by your state’s radon program. Certification requires training, an exam, and continuing education, and it gives you recourse if the work is substandard.
Other red flags to watch for:
Quotes significantly below the local average, which usually signals a cut-corner install.
No mention of post-installation testing, which is the only way to verify performance.
Discharge pipe that ends below the roofline or near a window.
No manometer installed on the system.
Refusal to pull permits or provide a written warranty.
Pressure to skip a long-term test before designing the system.
A reputable contractor will provide a free or low-cost estimate, walk you through the pipe routing options, explain the fan choice, and commit in writing to bringing your radon level below a specified target. Get at least three quotes, and ask each one for references from homeowners with similar foundations.
What to Do After Mitigation
Installing the system is only half the job. You need to confirm it works and then monitor it for the life of the home. Run a short-term test 24 to 48 hours after the system has been running continuously, then follow up with a long-term test during the next heating season when radon is at its worst.
Keep an eye on the manometer monthly. The fluid levels should sit noticeably off-center, typically 1 to 3 inches apart depending on the fan. If the levels equalize, the fan has failed, a pipe has come loose, or the system has lost suction for some other reason. Address it immediately, because radon will climb back to baseline within days.
If you have a continuous monitor, watch the long-term trend rather than the daily reading. A well-functioning SSDS should keep your home under 2 pCi/L, and ideally under 1 pCi/L. If your numbers creep back up after a year or two, the fan may be wearing out or a new crack may have opened in the slab.
FAQs
How to lower radon in basement naturally?
Natural methods include opening windows for cross-ventilation, sealing visible cracks with hydraulic cement and polyurethane caulk, and installing a Heat Recovery Ventilator (HRV). These steps can reduce radon by 10 to 50 percent, but they are temporary or partial fixes. The EPA does not consider natural ventilation a permanent solution because radon spikes in winter when windows must stay closed. For lasting results, a Sub-Slab Depressurization System is the recommended long-term answer.
Can you live in a house with high radon levels?
Yes, but you should not delay mitigation. Radon is the second leading cause of lung cancer after smoking, and the risk increases with the level and the length of exposure. A reading of 4 pCi/L is comparable to receiving about 200 chest X-rays per year. You can safely occupy the home while you test, get estimates, and schedule mitigation, which usually takes only one day to install.
How common is radon in basements?
Radon is present in nearly every home at some level because uranium exists in soil everywhere. The EPA estimates that about 1 in every 15 homes in the United States has radon above the 4 pCi/L action level. In high-risk zones, that ratio can climb to 1 in 3 or even 2 in 3 homes. Basements show the highest readings because they sit closest to the soil and trap the gas under the stack effect.
What month is radon the highest?
Radon levels are typically highest in the winter months, particularly January and February in cold climates. Frozen ground, snow cover, and closed windows trap soil gas near the home, while the stack effect intensifies as warm indoor air rises. Homeowners often see winter readings 2 to 5 times higher than summer readings. For this reason, long-term winter testing is the most reliable way to evaluate your actual exposure.
Final Thoughts on Lowering Radon in a Basement
Radon is one of the few serious home hazards that is fully fixable. Test long-term, interpret the result against the EPA 4 pCi/L threshold (and the WHO 2.7 pCi/L guideline), and install a Sub-Slab Depressurization System if your numbers warrant it. Sealing cracks and adding an HRV are useful supporting measures, but they rarely stand alone.
Knowing how to lower radon levels in a basement gives you the same playbook certified professionals use, whether you choose to install a system yourself or hire a licensed mitigator. The key steps never change: confirm the number, choose the method that fits your foundation and budget, verify performance with post-installation testing, and keep a monitor running year-round.
Your next step is to run or order a long-term test if you have not already. The number tells you everything you need to decide how much to invest, how quickly to act, and whether you need a professional on the job this season.