
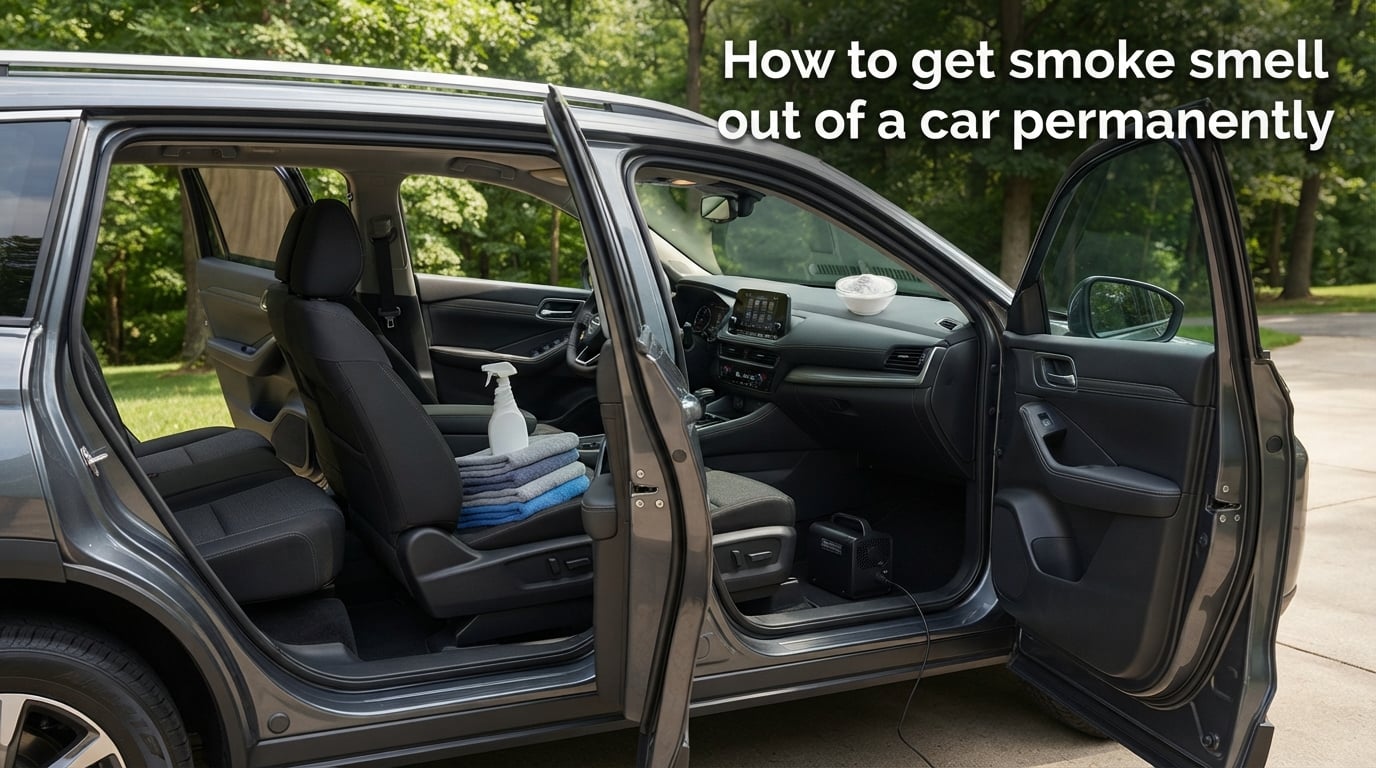
Buying a used car that reeks of cigarettes, or trying to refresh your own vehicle after quitting smoking, is one of the most frustrating cleaning challenges out there. I have spent years testing different methods to get smoke smell out of a car permanently, and I can tell you that air fresheners and quick sprays will never solve the problem. The tar and nicotine particles embed themselves deep into every porous surface, and they refuse to leave without a fight.
In this guide, I will walk you through exactly how to get smoke smell out of a car permanently using a proven multi-step process. We will cover everything from replacing your cabin air filter to running an ozone generator safely. By the end, you will have a clear action plan that professional detailers use every day.
Whether you are dealing with light smoke exposure from a previous owner or years of heavy smoking residue baked into the upholstery, the methods below will help. I have pulled insights from professional detailers, automotive forums, and my own hands-on experience to create a process that actually works.
Table of Contents
Why Smoke Smell Lingers: Understanding Thirdhand Smoke
Before we jump into cleaning methods, you need to understand what you are actually fighting. Smoke smell does not just float around in the air waiting to be sprayed away. It is a physical substance that coats every surface inside your car.
When someone smokes in a vehicle, the combustion releases thousands of chemical compounds. These include tar, nicotine, volatile organic compounds (VOCs), and hundreds of other byproducts. The heat from the cigarette helps these particles travel and settle into every crack, fiber, and surface.
This phenomenon is called thirdhand smoke. It refers to the toxic residue that remains on surfaces long after the cigarette has been extinguished. Thirdhand smoke is not just an odor problem. It coats your car’s interior at a molecular level, clinging to fabric fibers, foam cushioning, plastics, and even the metal components inside your HVAC system.
Here is where most people fail: they treat the symptom instead of the cause. Spraying an air freshener, hanging a scent tree, or wiping down visible surfaces only masks the smell temporarily. The tar and nicotine are still there, embedded in your headliner, your seat foam, your carpet padding, and your air ducts.
Heat and humidity make the problem worse. When your car sits in the sun, the rising temperature reactivates the trapped smoke particles. They release fresh bursts of odor molecules into the cabin air. This is why a car that seemed fine in the morning can reek of smoke by mid-afternoon on a hot day.
The HVAC system is another major hiding spot. Every time the previous owner ran the heater or air conditioning, smoke particles traveled through the ducts and deposited residue on the internal components. Your cabin air filter alone could be saturated with tar and nicotine, constantly recirculating the smell every time you turn on the fan.
Understanding this is the key to success. To get smoke smell out of a car permanently, you need to do three things: remove the physical residue, neutralize embedded odors at the molecular level, and replace contaminated components like the cabin filter. There is no shortcut around this.
How to Get Smoke Smell Out of a Car Permanently: The Complete Process
The process I am about to share works because it attacks the problem from every angle. I have refined this approach over dozens of vehicles, and it mirrors what professional detailers charge hundreds of dollars to do.
Here is the overview of the complete 7-step process:
Step 1: Replace the cabin air filter
Step 2: Vacuum every surface thoroughly
Step 3: Deep clean fabrics and upholstery with enzymatic cleaners and steam
Step 4: Clean hard surfaces and treat the headliner carefully
Step 5: Treat the HVAC system with a fogger or duct cleaner
Step 6: Run an ozone generator treatment
Step 7: Apply natural odor neutralizers as a final polish
Plan to spend a full weekend on this project for a heavily smoked-in vehicle. Light smoke exposure may only take a few hours. The timeline depends on severity, but rushing through the steps is the number one reason the smell comes back.
I recommend tackling the steps in order. Each step builds on the previous one, and skipping ahead can leave behind hidden residue that resurfaces later. For example, running an ozone generator before vacuuming will not work well because the loose particles will just absorb and re-release the odor.
Gather your supplies before starting. You will need a shop vacuum, microfiber towels, an enzymatic cleaner, a steam cleaner (or a carpet extractor like the Bissell Little Green), white vinegar, baking soda, an ozone generator, and a new cabin air filter. Having everything ready will keep you moving efficiently.
Step 1: Replace the Cabin Air Filter First
This is the single most overlooked step, and it is non-negotiable. If your cabin air filter is saturated with tar and nicotine, it will blow smoke particles into your cabin every single time you turn on the fan.
I learned this the hard way on a 2015 sedan I bought from a smoker. I spent an entire weekend deep cleaning every surface, only to turn on the AC and get hit with a wall of cigarette smell. The cabin filter was the culprit, and replacing it took five minutes.
Most cabin air filters are located behind the glove box or under the dashboard on the passenger side. Check your owner’s manual for the exact location and replacement procedure. The filter typically slides out of a plastic housing after releasing a clip or tab.
When you pull the old filter out, you will likely see a brownish-yellow discoloration. That is tar and nicotine residue. Hold it up to a new filter for comparison if you want to see how bad it really is.
Install the new filter, making sure the airflow direction arrows point the correct way. This step alone can reduce smoke odor by 30 to 40 percent, and it costs less than twenty dollars in most vehicles.
Step 2: Vacuum Every Surface Thoroughly
Before applying any cleaning solutions, you need to remove as many loose smoke particles as possible. Vacuuming physically extracts the dry tar and nicotine dust that has settled across your interior.
Start with the seats and work your way down. Use a brush attachment to agitate the fabric while vacuuming, which helps lift embedded particles from the fiber gaps. Spend extra time on seams and crevices where debris accumulates.
Move to the carpet next. Pull the floor mats out and vacuum them separately. Use a crevice tool to get deep into the edges where the carpet meets the door sills and seat tracks. These gaps trap an enormous amount of smoke residue.
Do not forget the trunk. Smoke particles travel throughout the entire cabin, and the trunk carpet and side panels absorb odor just as much as the passenger area. Vacuum the trunk floor, the spare tire well, and under the trunk liner if possible.
For cloth seats, use a stiff-bristled brush to agitate the fabric before vacuuming. This dry brushing technique lifts particles that are clinging to the fiber strands. Work in small sections and vacuum immediately after brushing each area.
A shop vacuum works better than a household model for this task. The stronger suction pulls more debris from deep within the foam and padding beneath the carpet. If you only have a household vacuum, use the highest setting and make multiple passes.
Step 3: Deep Clean Fabrics and Upholstery
This is where the real work begins. After vacuuming removes the loose particles, you need to extract the tar and nicotine that has bonded to the fabric fibers and soaked into the foam beneath.
I recommend using an enzymatic cleaner for this step. Enzymatic cleaners contain biological enzymes that break down organic compounds at a molecular level. Instead of masking the odor, they actually destroy the chemical structure of the tar and nicotine residue.
Spray the enzymatic cleaner evenly across cloth seats, carpet, and any fabric surfaces. Work it into the material using a soft-bristled brush in circular motions. The agitation helps the cleaner penetrate deeper into the fibers.
Let the enzymatic cleaner sit for the recommended dwell time. Most products require 10 to 15 minutes of contact time to fully break down the odor compounds. Do not let it dry completely during this period. If the surface starts to dry, apply a light mist to keep it active.
After the dwell time, extract the cleaner using a carpet extractor or a steam cleaner. The Bissell Little Green is a popular choice among DIYers and is frequently recommended on automotive forums. Hot water extraction pulls the dissolved tar and nicotine out of the fabric along with the cleaning solution.
If you do not have an extractor, use a shop vacuum with a upholstery attachment to remove as much moisture as possible. Follow up with microfiber towels, pressing firmly to absorb the liquid. You may need to repeat the process two or three times for heavily contaminated vehicles.
For leather seats, the approach is different. Smoke residue sits on the surface of leather rather than soaking in, but it still clings to the pores and stitching. Use a dedicated leather cleaner and a soft brush to agitate the surface gently. Wipe clean with a microfiber towel, then apply a leather conditioner to restore moisture.
Steam cleaning is another powerful option for cloth interiors. A steam cleaner like a handheld McCulloch or a professional-grade vapor steamer can penetrate deeper than liquid cleaning alone. The high temperature helps break down the tar bonds while sanitizing the surface. Move the steam nozzle slowly across the fabric, then immediately extract with a vacuum or towel.
Pay special attention to the seat belts. Fabric seat belt webbing absorbs a tremendous amount of smoke odor, and most people completely ignore them. Pull each belt out fully, spray with enzymatic cleaner, scrub gently, and let them air dry retracted.
Step 4: Clean Hard Surfaces and the Headliner
Smoke residue coats every hard surface in your car, even though you cannot always see it. The thin film of tar on your dashboard, door panels, steering wheel, and window glass continuously releases odor molecules.
Start with the glass. Smoke film on windows is often visible as a yellowish haze, especially on the windshield. Use an auto glass cleaner and a microfiber towel to scrub every window inside and out. You may need multiple passes to cut through the tar buildup completely.
For plastic and vinyl surfaces, use an all-purpose interior cleaner. Spray it onto a microfiber towel rather than directly onto the surface to avoid overspray on electronic components. Wipe down the dashboard, center console, door panels, steering column, and every plastic trim piece.
Get into the small gaps and crevices. Smoke residue loves to hide in the seams between panels, around buttons and knobs, and inside cup holders. Use a detail brush or a cotton swab dipped in cleaner to reach these tight spots.
Now for the tricky part: the headliner. The headliner is the fabric-covered ceiling of your car, and it is one of the biggest smoke odor traps in the entire vehicle. Hot air rises, which means smoke particles concentrate at the ceiling and soak into the headliner fabric and foam backing.
Here is the warning: headliners are delicate. The fabric is glued to a foam backing, and saturating the headliner with liquid can cause the glue to fail and the fabric to sag permanently. I have seen this happen, and it is an expensive repair.
To clean the headliner safely, use a DRY cleaning method whenever possible. Spray an enzymatic cleaner or upholstery cleaner onto a microfiber towel, not directly onto the headliner. Gently dab and wipe the surface without soaking it. Work in small sections and avoid aggressive scrubbing.
If the headliner has heavy staining, you can use a very light mist of cleaner and a soft brush. Blot immediately with a dry towel to remove moisture. Never let liquid pool or drip from the headliner. Keep a fan running inside the car afterward to ensure it dries completely.
Do not forget the sun visors, the rearview mirror housing, and the grab handles. These components all collect smoke residue and contribute to the overall odor.
Step 5: Treat the HVAC System
Your HVAC system is the hidden enemy in smoke odor removal. Even after replacing the cabin filter, the ductwork, evaporator core, and blower motor housing can still harbor tar and nicotine residue.
The most effective DIY method for treating the HVAC system is using an odor fogger or duct bomb. These products are designed to be released inside the vehicle while the system is running, allowing the cleaning mist to travel through every duct and coat the internal components.
Here is how to do it properly:
Turn the ignition to the accessory position (engine running for some products)
Set the fan to the highest speed
Turn on the recirculation mode so air pulls from inside the cabin
Close all windows and doors
Activate the fogger and place it on the floor or center console
Exit the vehicle and close the doors
Let the system run for 15 to 20 minutes with the fogger active
Turn off the system and let the vehicle sit with doors closed for an additional 30 to 60 minutes
After the treatment, open all doors and windows and let the vehicle air out thoroughly. Run the fan on high for 10 minutes with the windows down to clear any remaining fogger mist from the ducts.
If you prefer a more targeted approach, you can also clean the HVAC duct openings manually. Spray an enzymatic cleaner into each dashboard vent using the included straw attachment. Let it sit for 10 minutes, then run the fan on high to push the cleaner through the system.
For severe contamination, some detailers use a chlorine dioxide treatment. This involves dissolving chlorine tablets in water inside the vehicle to create a fogging effect. This method is powerful but requires careful handling and full ventilation afterward. Multiple Reddit users in r/AutoDetailing have reported excellent results with this technique.
Step 6: Ozone Generator Treatment
If there is one method that separates a temporary fix from a permanent solution, it is ozone treatment. Ozone generators are the most powerful tool available for eliminating smoke odor, and they are what professional detailers and car dealerships rely on for heavily smoked-in vehicles.
An ozone generator produces O3, or ozone gas. This gas is a highly reactive molecule that oxidizes odor compounds at a molecular level. When ozone comes into contact with tar, nicotine, and other smoke chemicals, it breaks them apart and destroys their ability to produce odor.
Ozone penetrates every surface that smoke has reached. It travels through fabric fibers, into foam padding, through HVAC ducts, and into every crack and crevice. There is no surface it cannot reach, which makes it far more effective than liquid cleaning alone.
Here is how to use an ozone generator in your car:
Clean the interior thoroughly first (Steps 1 through 5 are prerequisites)
Remove any items from the car including floor mats if possible
Place the ozone generator on the floor of the vehicle or on a stable surface
Run an extension cord from the generator to a power source outside the vehicle
Close all doors and windows but leave one window cracked slightly for the cord
Seal the cord gap with a towel
Run the generator for 1 to 2 hours for light contamination or 3 to 4 hours for heavy smoke
After the timer ends, let the car sit sealed for an additional 30 minutes to allow the ozone to convert back to oxygen
Open all doors and windows and air out the vehicle for at least 1 hour before entering
Multiple Reddit users in r/askcarguys report running ozone generators for 4 hours on heavily smoked-in vehicles with complete success. The consensus is clear: ozone works when other methods fail.
CRITICAL SAFETY WARNING: Ozone is toxic to humans and animals. Never run an ozone generator while anyone is inside the vehicle. Never run it in an attached garage where ozone can seep into your home. Always air out the vehicle completely before occupying it. Ozone can also degrade rubber and plastic components with prolonged or repeated exposure, so do not exceed the recommended treatment times.
After ozone treatment, you may notice a faint chemical or metallic smell. This is normal and dissipates within 24 to 48 hours with the windows down. Some people describe it as a clean, post-thunderstorm scent, which is the natural smell of ozone dissipating.
If the smoke smell persists after the first ozone treatment, repeat the process after 48 hours. Some vehicles with years of heavy smoking may require two or three sessions for complete elimination.
Step 7: Natural Odor Neutralizers (Baking Soda and Vinegar)
After completing the deep cleaning and ozone treatment, natural odor neutralizers serve as a final polish to absorb any residual smell molecules. These methods are inexpensive, safe, and surprisingly effective as maintenance tools.
Baking soda is one of the best natural odor absorbers available. It works through a process called adsorption, where odor molecules bond to the surface of the sodium bicarbonate particles. This physically traps the smell compounds and removes them from the air.
To use baking soda in your car:
Sprinkle a generous layer of dry baking soda across all carpet and floor mats
Work it into the fibers using a dry brush
Place open bowls of baking soda on the seats and dashboard
Leave the baking soda in place for 24 hours (this dwell time is critical)
Vacuum thoroughly to remove all traces of powder
Reddit users consistently recommend the 24-hour dwell time for baking soda. Shorter periods simply do not give the powder enough time to absorb deeply embedded odors. For heavily contaminated vehicles, repeat this process for two or three consecutive nights.
White vinegar is another powerful natural odor neutralizer. The acetic acid in vinegar breaks down many odor-causing compounds while its own smell evaporates completely within hours.
Fill a few small bowls with white vinegar and place them inside the vehicle overnight. Make sure they are stable and will not tip over onto the upholstery. Close the windows and doors and let the vinegar work for 8 to 12 hours.
For a more active treatment, mix equal parts white vinegar and water in a spray bottle. Mist the solution lightly across cloth seats and carpet, then blot with towels. The vinegar smell will dissipate as it dries, taking smoke odor molecules with it.
Activated charcoal is another option worth mentioning. Bags of activated charcoal can be placed inside the vehicle for ongoing odor absorption. Unlike baking soda, charcoal bags can be recharged by setting them in sunlight for a few hours and reused for months. They are a great low-maintenance option for keeping residual odors at bay.
Coffee grounds and citrus peels are sometimes suggested as natural odor maskers. While they smell pleasant, they only mask odors rather than neutralizing them. I do not recommend relying on these alone, but they can be a nice finishing touch after completing the full treatment process.
What Do Car Dealers and Detailers Use to Remove Smoke Smell?
If you have ever wondered why a used car from a dealership smells fresh despite clearly having a previous owner who smoked, it comes down to professional-grade tools and techniques. Dealers and detailers use the same fundamental principles we have covered, but with industrial-strength equipment.
Professional detailers typically follow this process:
Strip the interior completely, removing seats in some cases
Shampoo all fabrics with commercial hot water extractors
Use commercial-grade enzymatic cleaners with extended dwell times
Treat the HVAC system with professional fogging equipment
Run industrial ozone generators for extended periods
Apply thermal fogging treatments that penetrate deep into foam and padding
Thermal fogging is a technique professionals use that is difficult to replicate at home. A thermal fogger heats a specialized deodorizing compound until it vaporizes into a dry fog. This fog penetrates every surface at the same molecular level as the original smoke, effectively neutralizing odor compounds in places liquid cannot reach.
The cost difference between DIY and professional treatment is significant. A professional smoke odor removal service typically runs between $150 and $500 depending on severity and your location. Doing it yourself costs roughly $80 to $200 for supplies including an ozone generator rental or purchase.
For light to moderate smoke odor, the DIY methods in this guide can match professional results if you follow every step carefully. For severe contamination from years of heavy smoking, professional thermal fogging may be the only method that fully eliminates the smell.
If you decide to hire a professional, ask them specifically about their process. A reputable detailer will explain their steps, mention ozone treatment, and give you a realistic timeline. If they promise to remove smoke smell in an hour with a spray, look elsewhere.
Common Mistakes That Make Smoke Smell Worse
I have seen people make the same mistakes over and over when trying to remove smoke odor. Avoiding these pitfalls will save you time, money, and frustration.
Mistake 1: Relying on air fresheners. Scent trees, sprays, and plug-in fresheners only add fragrance on top of the smoke. They do nothing to remove the tar and nicotine. In fact, mixing heavy fragrances with smoke creates an even worse combined odor.
Mistake 2: Skipping the cabin air filter. A contaminated cabin filter will continuously blow smoke particles into your freshly cleaned interior. Always replace it as step one, not as an afterthought.
Mistake 3: Soaking the headliner. Saturating the headliner with cleaning solution breaks down the adhesive and causes sagging. Always use minimal moisture and blot-dry immediately.
Mistake 4: Running ozone before cleaning. Ozone works best on a clean surface. If loose debris and tar sit on top of the fabric, ozone cannot reach the deeper embedded particles. Clean first, ozone second.
Mistake 5: Not giving products enough dwell time. Enzymatic cleaners need 10 to 15 minutes. Baking soda needs 24 hours. Rushing through these steps means the active ingredients never get a chance to break down the odor compounds fully.
Mistake 6: Forgetting hidden areas. Seat belts, trunk carpet, headliner, sun visors, and the area under the spare tire all trap smoke. Missing any of these creates lingering odor sources that undermine your other efforts.
Mistake 7: Using too much water. Over-wetting carpets and seats can lead to mold and mildew, which adds a new odor problem on top of the smoke. Always extract moisture thoroughly and allow proper drying time with windows down and fans running.
What to Do If the Smell Comes Back
Sometimes the smoke smell returns even after a thorough treatment. This does not mean the process failed. It usually means there is a hidden reservoir of contamination that was not reached.
Heat is the most common trigger for returning odors. On a hot day, trapped particles deep inside seat foam or carpet padding can release fresh odor molecules. If this happens, a second ozone treatment combined with a focused steam cleaning of the problem area often resolves it.
Check your HVAC system again. Run the fan on high with all vents open and your nose near each vent. If one vent produces a smoky smell, the ductwork for that vent still has residue. Repeat the fogger treatment targeting that specific area.
In rare cases, the source may be behind the door panels or inside the seat foam itself. Removing door panels for interior cleaning or replacing seat foam are last-resort options for extreme contamination. This is where professional help becomes worth the investment.
For most vehicles, one complete treatment followed by a maintenance routine of baking soda and activated charcoal is enough to keep the smell away permanently. Be patient, and do not hesitate to repeat the ozone treatment if needed.
FAQs
Can you permanently remove cigarette smell from a car?
Yes, you can permanently remove cigarette smell from a car by combining deep cleaning, enzymatic treatment, HVAC fogging, and ozone generator treatment. The key is destroying the tar and nicotine at the molecular level rather than masking the odor. For heavy contamination, multiple treatments may be required.
What kills cigarette smell in a car?
The most effective methods for killing cigarette smell in a car include enzymatic cleaners that break down organic compounds, ozone generators that oxidize odor molecules, and hot water extraction that physically removes tar and nicotine from fabrics. Baking soda and activated charcoal also absorb residual odors.
What do car dealers use to get rid of smoke smell?
Car dealers typically use ozone generators, commercial enzymatic cleaners, hot water extraction, and thermal fogging to remove smoke smell. Thermal fogging is a professional technique that vaporizes deodorizing compounds into a dry fog that penetrates as deeply as the original smoke particles.
How do car detailers remove smoke smell?
Car detailers remove smoke smell through a multi-step process: replacing the cabin air filter, vacuuming all surfaces, deep cleaning fabrics with enzymatic cleaners and extraction equipment, treating HVAC ducts with foggers, running ozone generators for 1 to 4 hours, and applying final odor neutralizers.
How long does it take to get cigarette smell out of a car?
For light smoke exposure, the full treatment process takes about 4 to 6 hours including dwell times. For moderate contamination, expect a full weekend. Heavy long-term smoking may require multiple treatments over 1 to 2 weeks. Ozone treatment alone typically runs 1 to 4 hours per session.
Is ozone generator safe for car interior?
Ozone generators are safe for car interiors when used correctly, but the gas is toxic to humans and pets. Never occupy the vehicle during treatment. Air out the car completely for at least 1 hour before entering. Do not exceed recommended treatment times, as prolonged ozone exposure can degrade rubber and plastic components.
Does baking soda really work for car smoke smell?
Yes, baking soda effectively absorbs smoke odor molecules through adsorption. For best results, sprinkle it generously on carpets and seats, work it into the fibers, and leave it for 24 hours before vacuuming. Multiple Reddit users confirm the 24-hour dwell time is critical for effectiveness.
Can you get smoke smell out of a car after years of smoking?
Yes, but it requires the full treatment process and potentially multiple ozone sessions. Years of heavy smoking means tar and nicotine have penetrated deep into foam, carpet padding, and HVAC components. Professional thermal fogging may be necessary for complete elimination in extreme cases.
Conclusion
Learning how to get smoke smell out of a car permanently comes down to one core principle: you must destroy the tar and nicotine residue at the molecular level, not mask it. By replacing the cabin filter, vacuuming thoroughly, deep cleaning with enzymatic products, treating the HVAC system, running an ozone generator, and finishing with natural odor absorbers, you can eliminate even the most stubborn smoke odor.
The process takes patience and attention to detail, but the results are worth it. A clean, fresh-smelling car is more enjoyable to drive, healthier to ride in, and significantly easier to sell. Follow every step, avoid the common mistakes, and do not be afraid to repeat the ozone treatment if the smell lingers. Your future self will thank you the next time you open the door on a hot day and breathe clean air.