
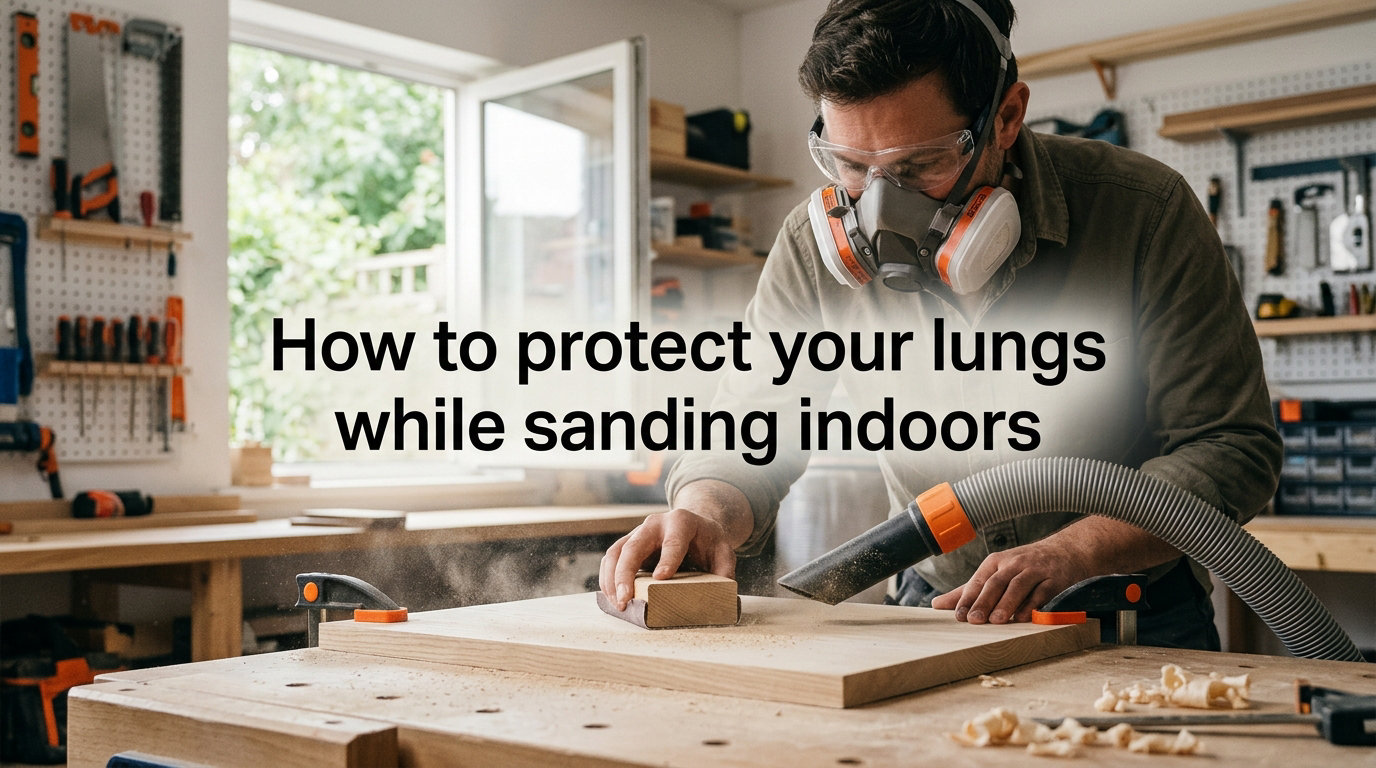
Sanding indoors without protecting your lungs is one of the fastest ways to damage your respiratory health. I learned this the hard way years ago when I spent an afternoon sanding drywall in a closed room with nothing but a cheap paper mask. That night, my chest burned and I could not stop coughing. If you are here, you are smarter than I was, and you want to do it right.
The best way to protect your lungs while sanding indoors is to wear a properly fitted NIOSH-approved respirator, create cross-ventilation with open windows and exhaust fans, and use dust collection methods to minimize airborne particles at the source. A P100 half-mask respirator offers the strongest protection, but a well-sealed N95 will handle most softwood sanding jobs. Ventilation matters just as much as your mask, because even the best respirator cannot protect you from dust that settles in your home and gets stirred up later.
In this guide, I will walk you through exactly what you need to know to protect your lungs while sanding indoors. We will cover the health risks, the different types of respiratory protection, how to properly fit and test your mask, ventilation strategies for small spaces, and practical dust containment tips. Everything here is based on NIOSH and OSHA guidance, plus real-world lessons from woodworkers who have made mistakes so you do not have to.
Table of Contents
Why Indoor Sanding Is Dangerous
Indoor sanding is dangerous because it releases fine particles into an enclosed space where they stay suspended in the air far longer than they would outdoors. When you sand wood, drywall, paint, or composite materials, you are creating dust particles small enough to reach deep into your lungs. Unlike outdoor sanding where wind carries particles away, indoor dust accumulates, recirculates, and concentrates in the air you breathe.
The particles generated by sanding are measured in microns. A single grain of beach sand is about 90 microns across. Sanding dust can produce particles as small as 0.3 to 10 microns, which are invisible to the naked eye but small enough to bypass your body’s natural defense systems. These are called respirable particles, and they are the ones that cause long-term damage.
What Happens When You Breathe Sanding Dust
When you breathe in sanding dust, larger particles get trapped in your nose and throat, causing irritation, sneezing, and coughing. The smaller respirable particles travel deeper into your airways and reach the alveoli, the tiny air sacs where oxygen exchange happens in your lungs.
Your immune system sends macrophages, a type of white blood cell, to engulf and remove these foreign particles. But when the dust load is heavy, your macrophages get overwhelmed. They cannot keep up, and the particles accumulate and trigger inflammation, scar tissue formation, and reduced lung function over time.
Short-term symptoms of breathing sanding dust include coughing, wheezing, chest tightness, throat irritation, and shortness of breath. I have heard from woodworkers on forums who experienced these symptoms after a single sanding session, even while wearing an N95. Long-term exposure is worse and can lead to chronic bronchitis, occupational asthma, and hypersensitivity pneumonitis, a condition where your lungs become inflamed from repeated exposure to organic dust.
Hardwood Dust Is a Known Carcinogen
Here is something that surprised me when I first learned it. The International Agency for Research on Cancer (IARC) classifies hardwood dust as a Group 1 carcinogen, the same category as asbestos and tobacco smoke. This classification means there is sufficient scientific evidence that hardwood dust causes cancer in humans, specifically nasal and sinus cancer.
This does not mean a single sanding project will give you cancer. But repeated unprotected exposure to hardwood dust, especially indoors where concentrations build up, is a serious health risk. Hardwoods like oak, mahogany, walnut, beech, and teak are particularly hazardous.
Softer woods like pine and cedar are somewhat less dangerous but still cause respiratory irritation and asthma. The point is that all wood dust poses a risk, and the enclosed nature of indoor sanding makes that risk worse.
MDF and other composite boards add another layer of risk because they contain urea-formaldehyde resins. Sanding MDF releases both wood particles and formaldehyde, a chemical that irritates the eyes, nose, and throat and is also classified as a carcinogen.
Drywall compound can contain silica, which causes silicosis, a serious and irreversible lung disease. Lead paint dust is dangerous at any exposure level, especially in older homes built before 1978. If you live in an older home, always test painted surfaces for lead before sanding.
Types of Respiratory Protection for Sanding
Not all masks are created equal when it comes to protecting your lungs while sanding. The type of respiratory protection you need depends on what you are sanding, how long the job takes, and the materials involved. Let me break down the options so you can choose the right one.
Dust Masks vs N95 Respirators: The Critical Difference
Many people use the terms “dust mask” and “respirator” interchangeably, but they are very different. A basic dust mask, the cheap paper or cloth mask you find at hardware stores, provides almost no protection against fine sanding particles. These masks are not NIOSH-certified, do not form a tight seal against your face, and allow dust to leak in around the edges.
An N95 respirator is a completely different category. It is tested and certified by NIOSH under standard 42 CFR 84 to filter at least 95 percent of airborne particles down to 0.3 microns.
The key difference is the seal. An N95 respirator is designed to form an airtight seal against your skin so that all the air you breathe passes through the filter material, not around it.
This seal is everything. A poorly sealed N95 performs no better than a cheap dust mask because unfiltered air just flows in through the gaps. This is why proper fit testing, which I cover below, matters so much.
When N95 Is Enough for Sanding
An N95 respirator is adequate for most softwood sanding tasks, such as pine, cedar, and spruce, when done for short durations. If you are hand-sanding a small project for 30 minutes or using a random orbital sander on softwood trim, a properly fitted N95 will protect your lungs effectively.
N95 masks are also suitable for sanding painted surfaces that you know are lead-free and for light drywall work in well-ventilated spaces. They are disposable, affordable, and easy to find at any hardware store. For occasional DIYers doing small indoor projects, N95 respirators are a solid choice.
However, N95 has limitations. It does not filter oil-based particles, which matters if you are sanding surfaces with oil-based finishes. It also becomes harder to breathe through as it clogs with dust, and it can fog glasses and cause discomfort during long sessions.
The single biggest complaint I see in woodworking forums is that disposable N95 masks do not seal well enough on some face shapes. This is especially true for people with beards or narrow faces. If your N95 leaks, you need a half-mask respirator with a flexible silicone facepiece.
P100 Respirators for Maximum Protection
For serious indoor sanding jobs, a P100 half-mask respirator is the gold standard. The “P” means it is oil-proof, so it filters both oil-based and non-oil-based particles. The “100” means it filters 99.97 percent of airborne particles, including the finest respirable dust.
P100 respirators are typically elastomeric half-masks with a silicone facepiece and replaceable filter cartridges. The silicone facepiece conforms to your face for a much better seal than a disposable N95. They are reusable, comfortable for extended wear, and the cartridges last much longer than disposable masks.
You should step up to a P100 respirator when sanding hardwoods, MDF, drywall compound, or any surface that may contain lead paint. I also recommend P100 for any indoor sanding job longer than an hour, regardless of material, because the better seal and higher filtration make a real difference over time.
For lead paint abatement, OSHA requires more than just a P100. You need a full-face respirator with P100 filters or a powered air-purifying respirator (PAPR). If you suspect lead paint, test it with a kit before sanding and follow proper abatement procedures.
How to Protect Your Lungs While Sanding Indoors: Proper Fit and Seal
Wearing the right respirator means nothing if it does not seal against your face. A proper seal ensures that all the air you breathe passes through the filter rather than sneaking in through gaps. Here is how to check your fit every single time you sand.
Step-by-Step Respirator Fit Check
You should perform both a user seal check before each use and ideally a full fit test when you first get a new respirator. The quick user seal check takes about 30 seconds and should become a habit before every sanding session.
Step 1: Position the respirator correctly. Place the mask over your nose and chin, making sure the nose clip or nose bridge sits on the bridge of your nose. For elastomeric masks, the chin should fit snugly into the chin cup.
Step 2: Secure the straps. For N95 respirators, place the top strap above your ears and the bottom strap below. For half-mask respirators, adjust all straps evenly so the mask sits centered on your face. The straps should be snug but not painfully tight.
Step 3: Mold the nose piece. Using both hands, press the nose clip down around the bridge of your nose to shape it to your face. Do not pinch it with one hand, as this creates an uneven seal.
Step 4: Perform a positive pressure seal check. Cover the exhalation valve (if your mask has one) with your palm and exhale gently. The mask should bulge slightly without any air leaking from the edges. If you feel air escaping, readjust the mask and straps.
Step 5: Perform a negative pressure seal check. Cover the filters or the center of the mask with both hands and inhale sharply. The mask should collapse inward against your face. If it does not, or if you feel air coming in from the sides, the seal is not working.
Signs Your Mask Is Not Sealing Properly
If your glasses fog up while wearing a respirator, that is a red flag. Fogging means warm, moist air is escaping from the top of the mask near your nose, which also means dust can get in. A properly sealed respirator directs exhaled air through the valve or filter, not up toward your eyes.
Other signs of a poor seal include feeling dust on your face after sanding, tasting or smelling dust while working, noticing dust inside the mask when you remove it, or finding that the mask shifts when you talk or move your head. Any of these mean you need to readjust or try a different mask model.
Beards and heavy stubble are the enemy of a good seal. Facial hair between the mask edge and your skin creates channels for air to bypass the filter entirely. If you have a beard, you have two options: shave before sanding, or use a powered air-purifying respirator (PAPR), which has a loose-fitting hood and does not require a tight face seal.
Ventilation Strategies for Indoor Sanding
Your respirator is your personal protection, but ventilation is your environmental protection. Good ventilation reduces the total amount of dust in the air, which means less dust to filter and less dust that settles on surfaces throughout your home. Even with a great mask, you should always ventilate when sanding indoors.
The goal of ventilation is simple: create a path for dusty air to leave the room while clean air comes in to replace it. This is called air exchange, and the faster you can exchange the air in a room, the lower your dust exposure will be.
Apartment and Small Space Ventilation
Ventilation is trickier in apartments and small homes where you cannot just open a garage door. But it is still possible to create effective airflow with a few simple tools. I have sanded in tight apartment spaces, and these strategies make a real difference.
Start by opening at least one window in the room where you are sanding. Then open a window or door on the opposite side of the apartment to create cross-ventilation. The goal is a clear path for air to travel from one opening, through your work area, and out the other side.
If you only have one window, place a box fan facing outward in that window. This creates negative pressure, pulling dusty air out of the room and drawing fresh air in from other rooms through the gaps under doors. This is one of the most effective DIY ventilation methods for enclosed spaces.
Using Fans and Negative Pressure
The negative pressure technique deserves more attention because it is so effective for indoor sanding. When you exhaust air out of a room faster than it can come in, the room becomes slightly lower in pressure than the surrounding space. Air flows from high pressure to low pressure, so clean air from the rest of your home gets pulled in under the door while dusty air gets pushed out the window.
To set this up, place a fan in the window pointing outside. Tape a furnace filter (MERV 11 or higher) to the back of the fan, facing into the room. This catches the largest dust particles before they hit the fan, extending the fan’s life and reducing how much dust gets blown outside into your yard.
Keep the room’s door closed while sanding to maintain the negative pressure. If dust is still traveling to other parts of the house, roll up a towel and place it along the bottom of the door as a seal. Many apartment dwellers report that dust travels upstairs even with the door closed, so the towel trick is worth the extra effort.
Run the exhaust fan during sanding and for at least 30 minutes afterward. Fine particles remain suspended in the air long after you stop sanding, and the continued ventilation helps clear them out before they settle on furniture and floors.
How to Sand Indoors Without Making a Mess
Dust control at the source is even better than ventilation at removing it after the fact. The less dust you create and release into the air, the less your lungs and your home have to deal with. Here are the most effective ways to sand indoors without turning the room into a dust storm.
Dust Collection and Vacuum-Assisted Sanding
If you are using a power sander, choose one with a dust port and connect it to a shop vacuum. This single step captures a huge percentage of dust before it ever becomes airborne. Random orbital sanders, palm sanders, and detail sanders all come in models with dust collection ports, and the difference is night and day.
For the vacuum to work well, use a HEPA filter. Standard shop vacuum filters let the finest and most dangerous particles pass right through and back into the air. A HEPA filter captures 99.97 percent of particles down to 0.3 microns, the same standard as a P100 respirator.
If your shop vac does not have HEPA capability, at minimum use a fine dust bag and a secondary filter. You can also buy aftermarket dust collection attachments that fit over hand sanding blocks. These connect to a vacuum hose and suck dust away as you sand by hand, and woodworkers on forums swear by them for indoor work.
Containment Strategies
Beyond dust collection, you can contain the mess with physical barriers. Hang plastic sheeting (4-mil or thicker) over doorways and seal it with painter’s tape. Cover furniture, floors, and vents with drop cloths or plastic. Seal HVAC return vents with plastic and tape so dust does not get pulled into your ductwork and distributed throughout the house.
Consider building a simple sanding tent by hanging plastic sheeting from the ceiling to create a small enclosed work area. This concentrates the dust in a small space that is easier to ventilate and clean. An indoor sanding tent is especially useful in apartments and shared living spaces where dust spread is a major concern.
Wet sanding is another excellent option for certain materials. Wet sanding uses water or a lubricant to keep dust from becoming airborne in the first place. The particles stay trapped in the wet slurry instead of floating in the air.
This works well for drywall, auto body work, and between-coat wood finishing. It is not suitable for raw wood sanding, but for many indoor projects it eliminates the dust problem entirely.
Additional Protection Tips
Your lungs are the primary concern, but sanding dust affects other parts of your body too. A complete indoor sanding safety setup includes protection for your eyes, skin, and overall cleanliness.
Eye Protection and Clothing
Wear safety goggles, not just glasses, when sanding. Dust particles can get behind regular glasses and irritate your eyes. Goggles with a tight seal prevent this and also protect against larger debris that can fly off the sander.
If your goggles fog up, treat them with anti-fog solution or choose goggles with ventilation slots. Wear long sleeves and long pants to keep dust off your skin, because wood dust can cause contact dermatitis, a red itchy rash that develops from repeated skin exposure.
Post-Sanding Cleanup
Cleanup is part of lung protection because settled dust gets resuspended every time you walk through the room. Vacuum surfaces with a HEPA vacuum before wiping them down. Do not dry-sweep, which launches settled dust back into the air. Use a damp rag or mop for final cleaning to trap remaining particles.
If you experience chest tightness, coughing, or shortness of breath after sanding, get fresh air immediately. These symptoms usually resolve within a few hours, but if they persist for more than 24 hours, see a doctor. Repeated episodes are a sign you need to upgrade your protection or change your approach.
FAQs
Is N95 enough for sanding?
An N95 respirator is sufficient for most softwood sanding and short-duration indoor projects. It filters 95 percent of particles down to 0.3 microns. However, for hardwood sanding, MDF, drywall compound, or extended indoor sessions, upgrade to a P100 respirator for 99.97 percent filtration and a better face seal.
Does N95 protect against sanding dust?
Yes, a properly fitted NIOSH-approved N95 respirator protects against sanding dust by filtering at least 95 percent of airborne particles. The key is the seal. If the mask does not form an airtight fit against your face, dust bypasses the filter entirely and the protection drops significantly.
What happens if you breathe in sanding dust?
Breathing sanding dust causes coughing, wheezing, throat irritation, chest tightness, and shortness of breath. Fine particles reach deep into the lungs where they trigger inflammation. Long-term exposure can lead to chronic bronchitis, asthma, hypersensitivity pneumonitis, and cancer. Hardwood dust is classified as a Group 1 carcinogen by the IARC.
How long does wood dust stay in your lungs?
Your lungs can clear some wood dust particles within days to weeks through the action of macrophages and mucus transport. However, the finest respirable particles can remain embedded in lung tissue indefinitely. Repeated exposure overwhelms the clearance system, causing particles to accumulate and trigger chronic inflammation and scarring.
What mask is best for sanding dust?
A P100 half-mask respirator is the best choice for sanding dust because it filters 99.97 percent of airborne particles and forms a tight silicone seal against your face. For occasional softwood sanding, a properly fitted N95 is adequate. For lead paint abatement, use a full-face respirator with P100 filters.
Is it safe to sand inside?
Sanding indoors is safe when you combine a properly fitted respirator, good ventilation with exhaust fans, and dust collection at the source. Without these protections, indoor sanding concentrates hazardous particles in enclosed air and significantly increases health risks. Always ventilate the space and wear appropriate respiratory protection.
How to sand indoors without making a mess?
Use a sander with dust collection connected to a HEPA vacuum, seal doorways with plastic sheeting, cover vents and furniture with drop cloths, create negative pressure with an outward-facing window fan, and use wet sanding where possible. Clean up with a HEPA vacuum and damp rags rather than dry sweeping.
Protecting your lungs while sanding indoors comes down to three things: the right respirator, proper ventilation, and dust control at the source. A NIOSH-approved N95 handles most light sanding jobs, but a P100 half-mask is worth the investment for hardwoods, MDF, and longer projects. Remember that the seal matters as much as the filter rating, so always do your fit check before you start sanding. Ventilate with an outward-facing window fan to create negative pressure, connect your sander to a HEPA vacuum, and seal off the rest of your home with plastic sheeting.
These steps are not overkill. They are the difference between a safe project and one that costs you your health. Take lung protection seriously every single time, because the damage from sanding dust is cumulative, invisible, and permanent. Your future self will thank you.