
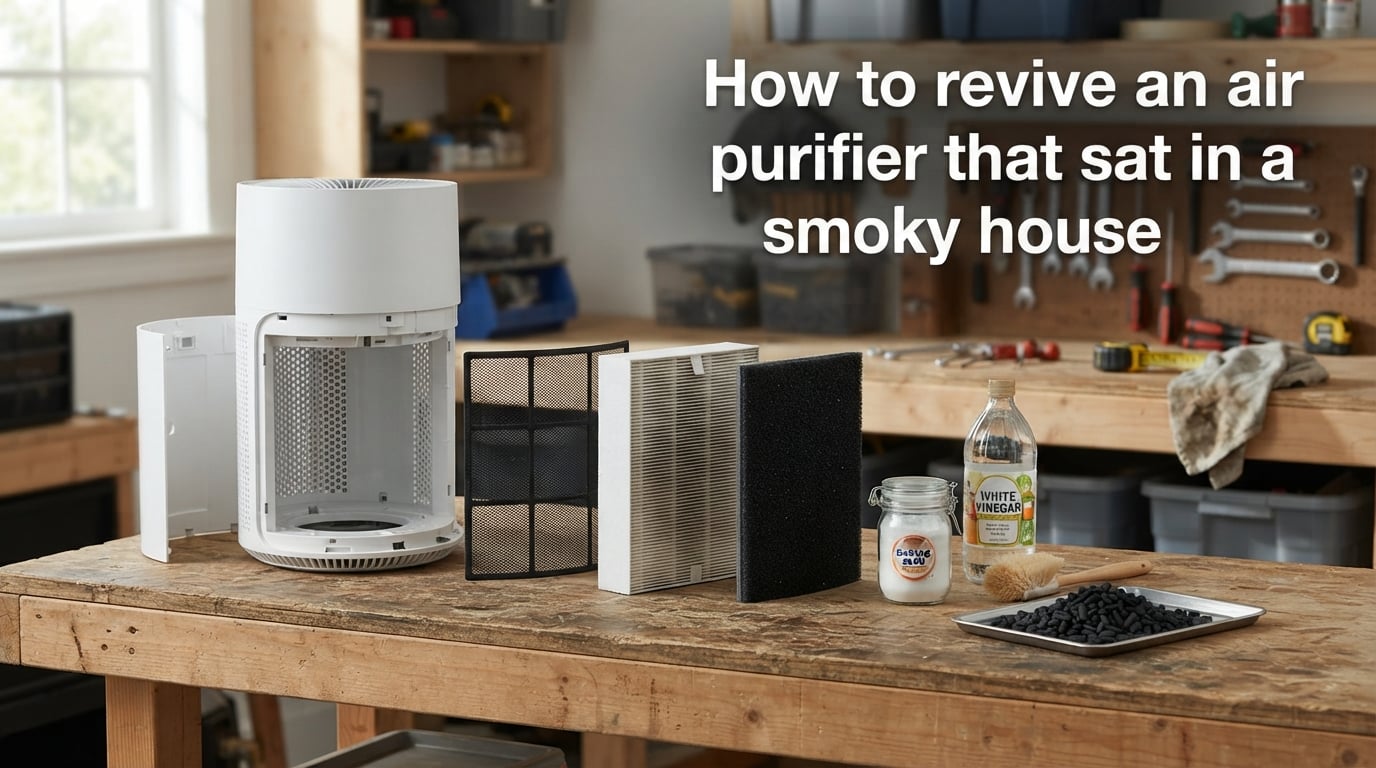
If you just moved into a home where someone smoked for years, or your air purifier survived a wildfire season sitting in storage, you already know the smell. You plug it in hoping for fresh, clean air, and instead it pushes stale tobacco or charred wood right back into the room. That unit is not broken. It is saturated. And learning how to revive an air purifier that sat in a smoky house can save you anywhere from $80 to $600 on a replacement.
I have helped several friends and family members through this exact situation after wildfire seasons in California and a long-term smoker’s home in Texas. The good news: most units can be revived. The bad news: some filters cannot be saved no matter how much baking soda and patience you throw at them.
This guide walks you through exactly what happens inside a smoke-exposed air purifier, which parts you can clean versus which you must replace, and a step-by-step revival process that actually works. We will cover natural cleaning methods, ozone treatments (with proper warnings), and how to know when it is time to throw in the towel and buy a new unit.
By the end, you will have a clear plan, a realistic timeline, and a checklist of materials you likely already have at home. Smoke odors are stubborn, but they are not impossible.
Table of Contents
Why Smoke Damages Air Purifiers
Smoke is one of the hardest indoor pollutants to deal with because it is not just one thing. A single puff of cigarette smoke contains over 7,000 chemicals, including particulate matter, volatile organic compounds, and sticky tars. Wildfire smoke brings its own mix of fine particles, ash, and combustion gases.
When your air purifier sits in a smoky house, even when it is turned off, those contaminants do not just sit on the surface. They work their way into every porous material inside the unit. That is why a quick wipe-down almost never fixes the problem.
How HEPA Filters Trap Smoke Particles
HEPA filters work by forcing air through a dense mat of randomly arranged fibers. They capture at least 99.97 percent of particles that are 0.3 microns in diameter, which is right in the sweet spot of smoke particle sizes. Cigarette smoke particles range from about 0.01 to 4 microns, while wildfire smoke is mostly PM2.5, meaning particles under 2.5 microns.
Here is the catch. A HEPA filter that ran in a smoker’s home for months has captured thousands of those particles. The filter media itself becomes a sponge for smoke chemicals. Once saturated, every puff of air the unit pushes through carries a faint whiff of old smoke back out.
The Role of Activated Carbon in Odor Removal
Activated carbon is what tackles smells, not particles. It works through a process called adsorption, where smoke gases and VOCs stick to the surface of millions of microscopic carbon pores. A good carbon filter can hold a surprising amount of odor compounds.
The problem is capacity. Carbon has a finite number of pores, and once they are full, the filter stops working. Heavy smoke exposure can saturate a carbon filter in weeks rather than the usual three to six months. Worse, the trapped compounds slowly release back into the air when the filter heats up or gets humid.
How Smoke Penetrates Plastic Housing
The filters are only half the story. Air purifier housings are usually plastic, and plastic is more porous than it looks. Thirdhand smoke, the residue that clings to walls, furniture, and appliances long after the smoke clears, bonds chemically with plastic surfaces.
That yellowish-brown film you sometimes see on old electronics? That is tar and resin from smoke, and it does not come off with a casual wipe. The internal fan blades, the air ducts, even the seams where the casing pieces meet, all collect this residue. If you do not clean the housing, the smoke smell will keep coming back no matter how many times you change the filters.
Signs Your Air Purifier Is Smoke-Contaminated
Before you start tearing the unit apart, it helps to confirm that smoke contamination is actually the problem. Here are the most common warning signs I look for, based on units I have inspected and what Reddit users in r/AirPurifiers describe over and over.
Persistent smoke smell when running. If you turn the unit on and the air coming out smells like an ashtray or a campfire, that is smoke residue being pushed through saturated filters or off the housing itself.
Reduced airflow or weak fan performance. Smoke particles clog filter media over time, restricting how much air can pass through. If your unit feels sluggish even on high, the filters may be choked with tar.
Visible discoloration on filters or housing. A pre-filter that should be white or gray but is now brown or yellow has been catching smoke. Open the unit and look for sticky residue on the fan blades and interior walls.
Burning or chemical smell when first turned on. This is a sign of activated carbon releasing trapped VOCs as it heats up. It usually fades after a few minutes, but if it keeps happening, the carbon is spent.
Smell persists even with the unit off. If the air around the purifier smells smoky when the unit is unplugged, the housing itself has absorbed odor. This is the toughest case and the one most likely to require full disassembly.
What You Will Need to Revive the Unit
One of the things I like about this process is that most of the supplies are already in your kitchen or cleaning closet. You do not need specialty products. Here is the basic kit I keep on hand for smoke-damaged electronics.
Natural deodorizers:
Baking soda (a full box, minimum)
White vinegar
Activated charcoal pellets (sold cheap online or at pet stores)
Coffee grounds (optional, but effective for stubborn smells)
Cleaning supplies:
Soft-bristled brushes, like an old toothbrush
Microfiber cloths
Mild dish soap
Isopropyl alcohol (70 percent or higher)
Cotton swabs for tight corners
Tools:
Phillips and flathead screwdrivers
Small container or zip-top bags for screws
User manual (for reassembly reference, most are available online if you lost yours)
Optional but powerful:
Ozone generator (use only with strict safety precautions, more on that below)
Replacement pre-filter, HEPA filter, and carbon filter (order in advance if you know the model)
Pick a well-ventilated workspace. A garage with the door cracked open, a covered patio, or a room with multiple windows works. You will be handling smelly, sometimes sticky residue, and you do not want those odors migrating back into your living space.
Step-by-Step Revival Process
This is the heart of the guide. Follow these steps in order, and do not rush the drying phase. Most failed revivals I have seen came from skipping step 5.
Step 1: Unplug and Disassemble
Unplug the unit and let it sit for at least an hour so any static charge dissipates. Then remove the front panel, the pre-filter, the HEPA filter, and the activated carbon filter. Most consumer air purifiers use a tab-and-pull design, but some have a couple of screws hidden under rubber feet or stickers.
Lay each filter flat on a clean surface and label them if you are not sure what each one does. Take photos as you go so reassembly is easier. Put screws in a small container so they do not get lost in carpet or drain grates.
Step 2: Decide Which Filters to Clean vs Replace
This is the most important decision in the whole process. As a general rule:
Pre-filters (foam or mesh): almost always cleanable.
HEPA filters: almost always replace if heavily smoke-exposed.
Activated carbon filters: replace, do not try to regenerate.
Carbon pellets (loose, refillable type): can sometimes be baked and reused.
Washing a HEPA filter with water damages the fiber mat and voids most warranties. Vacuuming it gently with a brush attachment can extend its life a little, but a smoke-saturated HEPA is done. Order replacements now so they arrive by the time you finish cleaning the housing.
For carbon filters, some users try baking them at 200 degrees Fahrenheit for an hour to drive off trapped VOCs. This sometimes works for light contamination but rarely revives a filter that sat in a smoker’s house for years.
Step 3: Wash the Housing and Internal Parts
Mix warm water with a few drops of mild dish soap. Wipe down every interior and exterior surface with a microfiber cloth, paying special attention to the seams, vents, and any grooves where tar collects. An old toothbrush works wonders in tight corners.
For sticky residue that soap will not cut, dampen a cloth with isopropyl alcohol and spot-test on a hidden area first. Alcohol can dull some plastics, so use it sparingly. Wipe the fan blades carefully, both sides, since tar builds up on the leading edges and throws the fan off balance.
Rinse everything with a clean damp cloth. Do not submerge the unit or spray water directly into any electronic openings. The motor housing should stay completely dry.
Step 4: Deodorize With Baking Soda and Charcoal
Once everything is clean and towel-dried, place the disassembled housing parts in a large plastic bin or garbage bag. Sprinkle a generous layer of baking soda over all surfaces, then add a few open containers of activated charcoal pellets and a bowl of dry coffee grounds if you have them.
Seal the bag or close the bin and let it sit for at least 48 hours, ideally five to seven days for heavy contamination. Baking soda absorbs odor compounds, while activated charcoal actively pulls VOCs out of the plastic. This slow soak is what gets the deep, baked-in smells out.
For really stubborn cases, repeat the process with fresh baking soda and charcoal after the first round. It is not glamorous, but it works.
Step 5: Dry Thoroughly Before Reassembly
This step gets skipped more often than any other, and it ruins revivals. Even a slightly damp filter or housing will grow mold within days, and mold smells worse than smoke.
After the deodorizing soak, brush off the baking soda and let every part air dry in a well-ventilated spot for at least 24 hours. Use a fan to keep air moving. If you have a sunny outdoor spot, a few hours of direct sunlight helps kill odor-causing bacteria and speeds drying.
Check inside every vent and seam for trapped moisture before you start putting things back together. A quick swipe with a dry microfiber cloth on interior surfaces catches what you might miss.
Step 6: Reassemble and Test
Install the new or cleaned filters in the correct order: pre-filter first, then HEPA, then activated carbon. Refer to your photos from Step 1 if you are unsure. Close up the housing, plug the unit in, and run it on low for ten minutes in a small room.
Stand close and smell the output air. It should be neutral or have a faint clean ozone scent from the motor. If you still smell smoke, the contamination is deeper than the cleaning reached, and you will need to repeat the deodorizing soak or consider an ozone treatment.
Cleanable Components vs Replace-Only Components
One of the biggest questions people have is which parts of an air purifier can actually be saved. Here is the honest breakdown based on what I have seen work and what forum users consistently report.
Pre-filters (foam or mesh): Cleanable. Wash with soap and warm water, rinse well, and air dry completely. If they are torn or have lost their shape, replace them. They are usually cheap, often under $15.
HEPA filters: Replace-only after smoke exposure. Vacuuming gently can add a few weeks of life, but a filter that sat in a smoker’s home is saturated at the chemical level. Replacement is the only real fix.
Activated carbon filters: Replace-only. Carbon has a fixed adsorption capacity, and once it is full of smoke compounds, you cannot drive them off at home temperatures. Replacement carbon filters run $20 to $60 depending on the brand.
Carbon pellet media (refillable): Sometimes reusable. Spread pellets on a baking sheet and heat at 200 degrees Fahrenheit for an hour. This works for light exposure but not heavy saturation.
Plastic housing and fan blades: Cleanable with the methods above. Heavy tar buildup may need an alcohol wipe followed by a long baking soda soak.
Motor and electronic components: Do not clean these yourself beyond a gentle wipe of the exterior housing. If the motor smells like smoke, an ozone treatment is your safest bet.
How Long the Revival Process Takes
People always want a timeline, so here is what to expect based on contamination level. These are real numbers from units I have worked on and what other restoration hobbyists report.
Light smoke exposure (a few weeks of cigarette smoke or a single wildfire event): Cleaning takes about an hour. Drying takes another 24 hours. The unit is usually fully revived in two to three days.
Moderate smoke exposure (several months of cigarette smoke or repeated wildfire seasons): Plan on the full cleaning process plus a five to seven day baking soda and charcoal soak. Total turnaround is about a week.
Heavy smoke exposure (years in a smoker’s home or fire damage): You are looking at multiple cleaning rounds, a long deodorizing soak, often an ozone treatment, and full filter replacement. Realistic timeline is two to three weeks, and success is not guaranteed.
Build in extra time for shipping if you need to order replacement filters. Sometimes the only thing standing between you and a working unit is a $30 carbon filter that takes a week to arrive.
When to Replace Instead of Revive
Not every air purifier can be saved, and pretending otherwise wastes your time and money. Here is when I tell people to stop cleaning and start shopping.
Permanent smoke saturation in the motor. If the smell comes back within hours of a thorough cleaning and new filters, the motor windings or internal wiring have absorbed smoke compounds. There is no safe DIY fix for that.
Visible mold or water damage. If the unit was stored in a damp smoky environment and you see fuzzy patches inside, throw it out. Mold spores spread through the air and pose serious health risks.
Replacement filters are discontinued. Some manufacturers stop making filters for older models. If you cannot source HEPA or carbon replacements, the unit is effectively dead.
The unit is more than seven to ten years old. Even high-end purifiers lose efficiency over time. Motor bearings wear out, fan blades warp, and the cost of filters plus your time often exceeds the price of a newer, more efficient model.
As a rough cost guide, if you are spending more than 60 percent of a new unit’s price on filters, cleaning supplies, and your own time, replacement makes more sense. A solid mid-range air purifier runs $150 to $300 in 2026, and newer models often handle smoke better than units from a decade ago.
Preventing Future Smoke Contamination
Once you have gone through the revival process, you do not want to repeat it. A few simple habits keep your air purifier smelling clean for years.
Store it properly. If you are not using the unit for a while, remove the filters, seal them in a plastic bag with a sachet of baking soda, and store the housing in a closed cabinet away from any smoking or cooking areas.
Change filters on schedule. HEPA filters typically last 12 to 18 months. Carbon filters last 3 to 6 months, less in smoky environments. Set calendar reminders so you do not forget.
Run the unit in a smoke-free zone. If someone in your home smokes, ask them to do it outside. Air purifiers can reduce smoke particles indoors, but they cannot keep up with continuous source pollution, and the filters will saturate fast.
Add a pre-filter for extra protection. Cut-to-fit carbon pre-filter sheets cost about $10 and trap the largest smoke particles before they reach your expensive HEPA filter. They extend the life of your main filters significantly.
Air out the unit periodically. Every few months, take the unit outside on a dry sunny day, remove the filters, and let the housing air out for an hour. Sunlight and fresh air are surprisingly effective at keeping odors at bay.
FAQs
How long does it take for an air purifier to get rid of smoke smell?
A working air purifier with fresh HEPA and activated carbon filters can noticeably reduce smoke smell in a room within 30 minutes to a few hours. Full odor removal in a heavily contaminated space can take 24 to 72 hours of continuous running, especially if the source of the smoke is still present.
Why does my air purifier smell like smoke even after cleaning?
If your air purifier still smells like smoke after cleaning, the contamination has penetrated deeper than the surfaces you wiped. The plastic housing, fan blades, or motor interior have absorbed thirdhand smoke compounds. You will need a longer baking soda and activated charcoal soak, or possibly an ozone treatment, to reach those trapped odors.
Can I use an ozone generator to clean my air purifier?
Yes, but with strict safety precautions. Ozone is toxic to breathe and damages rubber and some plastics over time. Place the air purifier in a sealed room, run the ozone generator for 2 to 4 hours, then air out the space completely for at least 2 hours before entering. Never run an ozone generator in an occupied space.
How do I clean a HEPA filter without damaging it?
You cannot wash a HEPA filter with water without damaging the fiber mat and voiding the warranty. The safest cleaning method is gentle vacuuming with a brush attachment on low suction. For smoke-saturated HEPA filters, replacement is the only reliable option since the contamination is at the chemical level.
Should I replace or clean my filters after smoke exposure?
Replace the HEPA and activated carbon filters after heavy smoke exposure, since both have a fixed capacity and cannot be effectively regenerated at home. Pre-filters can usually be washed and reused. As a rule, if smoke exposure lasted more than a few weeks, plan on full filter replacement.
How long should I air out an air purifier after smoke exposure?
For light smoke exposure, air out the disassembled unit for 24 to 48 hours in a well-ventilated space. For moderate to heavy exposure, plan on 5 to 7 days with a baking soda and activated charcoal soak sealed in a bag or bin. Sunny outdoor airing for a few hours each day speeds up the process significantly.
Wrapping Up
Reviving an air purifier that sat in a smoky house is mostly about patience and knowing which parts to clean versus which to replace. Vacuum or replace the HEPA filter, swap out the activated carbon, scrub the housing with soap and alcohol, then soak everything in baking soda and charcoal for as long as it takes. Skip the drying step and you will regret it.
The process is genuinely worth trying before you buy a new unit. Most moderately contaminated air purifiers come back to life within a week, and even heavily smoked units often respond to a patient multi-round cleaning plus fresh filters. Only throw in the towel when the motor itself smells like smoke or the cost of parts approaches the price of a new machine.
Take your time, follow the steps in order, and trust your nose. If the output air smells clean after the revival process, you have done it right. Now maintain it with regular filter changes and proper storage so you never have to do this again.